

It's a while since the last time I posted a recipe on this blog! It's not like I haven't baked anything, but it's usually been so late at night that taking decent photos has been impossible and by the time it has been light again everything has been, well if not gone, at least half eaten...
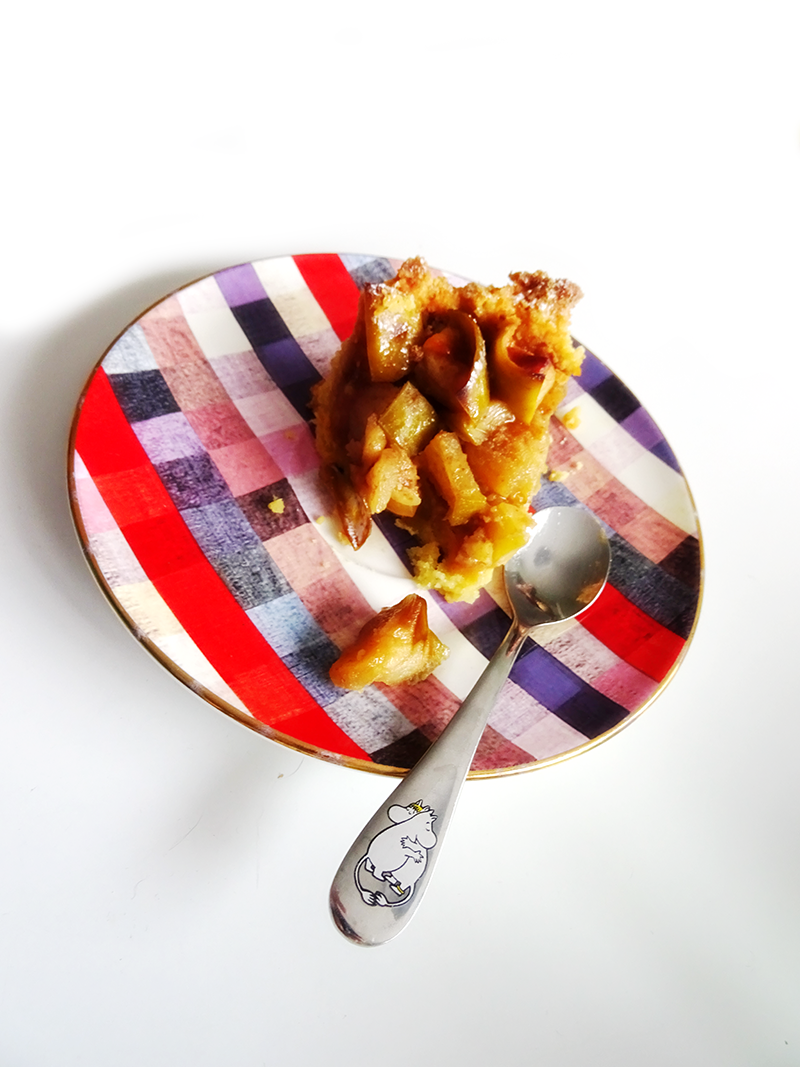
This recipe started out as a classic French Tarte Tatin but it has been modified quite a few times, first by my grandmother and then by me. The recipe is copied from some old cook book with handwritten notes by my grandma so it's very precious to me. Today I will share it with you.
This recipe started out as a classic French Tarte Tatin but it has been modified quite a few times, first by my grandmother and then by me. The recipe is copied from some old cook book with handwritten notes by my grandma so it's very precious to me. Today I will share it with you.
Tarte Tatin is originally an upside down apple tart, but I've noticed it's hard to get the crust right with gluten and wheat free flour. It just doesn't want to stay in one piece so that you could neatly lift it on top of the filling without it crumbling to pieces. So I've modified the cake to be baked right-side up, i.e. the crust is in the bottom and the filling comes in top of it. I have included the instructions to make my grandmother's version which is an upside down cake, but note that you should use regular all-purpose flour if you wish to do it this way.


Ingredients:
For the filling:
500-750 g apples (I use Granny Smith but other varieties work fine as well)
0.5 dl calvados, or orange or almond liquor (I use Cointreau)
100g butter
2 dl sugar
1 Tbsp. corn or potato starch
For the crust:
100g butter
3 dl flour (for the gluten free version I use 1:1 corn meal and rice flour)
*0.5 dl corn or potato starch (only if you are baking a gluten free cake)
1 dl confectioner's sugar
1 small egg
1. Dice the apples into small cubes (about the size of a sugar cube) and put them into a bowl. Pour the liquor over the apples, cover well and marinate for a couple of hours in the room temperature.
2. Preheat your oven to 200 degrees C. Prepare a springform cake pan by greasing it (mine has a 24 cm diameter).
3. Filling: In a cast iron skillet (or any other pan you have) melt the butter and add the sugar. Bring to boil and give it an occasional stir. When the mixture starts to turn golden brown and caramel-like add the apple cubes. Note: try to lift the apples carefully leaving as much of the liquor as possible into the bottom of the bowl. Let the apples cook in the caramel mixture until they are soft (about 5 minutes). Mix 1 tablespoon of corn or potato starch with the liquor and drop by drop add it to the mixture stirring at the same time. Let the apples cool while you make the crust.
4. Crust: Dice the butter into small cubes. Mix it with the flour(s), starch (if using) and confectioner's sugar until the mixture becomes crumbly. Add the egg and mix well.
5. Follow these directions if you are making a normal apple cake: Press the crust into the springform pan starting from the sides and making your way to the middle. Pour the apple mixture over the crust and put the cake into the oven. Bake for 25-30 minutes or until the crust turns golden brown. Let the cake cool for a while before serving.
*5. Follow these directions if you are making an upside-down cake: Pour the apple mixture into the cake pan. Roll the crust out so that it's large enough to cover the cake. Quickly lay the crust over the apples. Bake for 25-30 minutes or until the crust turns golden brown. Let the cake cool for a while before running the blade of a knife round the edge to let loose any crust that has stuck. Remove the edge from the springform pan, and invert a plate over the crust, then turn the cake around.
*One more note: If you have an oven-safe cast-iron skillet (no wooden or plastic parts) or another skillet that you can safely put into the oven (diameter about 24 cm) you can skip the springform cake pan and do a more traditional Tarte Tatin. You just keep the apples in the skillet and roll the crust over it. The cake bakes in the skillet. I don't have a suitable skillet so that's why I use a cake pan.
Enjoy!
Comments
Post a Comment